It Works Opportunity

It Works Opportunity
Health and Wellness coming your way
Showing posts with label Mailbox Thursday. Show all posts

Thursday, April 11, 2013

Mailbox Thursday

Are your kids bored and you need a project for them to do. Well here's a great couple of art projects to keep their little hands busy.

Tadpole Pail: 
 
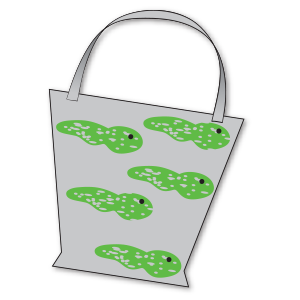
Collecting a pail full of tadpoles has never been easier! Press a tadpole-shaped sponge in a shallow pan of green paint and then onto a silver poster board pail cutout. Repeat the process, adding paint as needed, until a desired effect is achieved. When the paint is dry, use a marker to add an eye to each tadpole; then attach a paper handle to the pail.


 Puff Painting: 

Type: craft
The forecast for this drip-drop display is a puff of wind and a shower of fun!
Supplies:
  • scissors
  • 9" x 12" blue construction paper
  • eye droppers
  • thinned dark blue and light blue tempera paint
Setup:
Cut a large raindrop shape from the blue paper and then cut out the center to make a frame.
Steps:
  1. Use an eyedropper to drip several drops of each paint onto the white paper.
  2. Use the straw to blow the paint around the paper. Let it dry.
  3. Glue the frame onto the painted paper.
  4. Trim the excess paper away from the outside of the frame.

Type: craft
The forecast for this drip-drop display is a puff of wind and a shower of fun!
Supplies:
  • scissors
  • 9" x 12" blue construction paper
  • eye droppers
  • thinned dark blue and light blue tempera paint
Setup:
Cut a large raindrop shape from the blue paper and then cut out the center to make a frame.
Steps:
  1. Use an eyedropper to drip several drops of each paint onto the white paper.
  2. Use the straw to blow the paint around the paper. Let it dry.
  3. Glue the frame onto the painted paper.
  4. Trim the excess paper away from the outside of the frame.
- See more at: http://www.theeducationcenter.com/af/nl/tec/core/efile/CompanionDetailViewer.do?DETAIL=040713_artscrafts_03&utm_source=ArtsCrafts3&utm_medium=Email&utm_content=Text&utm_campaign=040713ArtsandCrafts#sthash.dSLi8Ic4.dpuf

Type: craft
The forecast for this drip-drop display is a puff of wind and a shower of fun!
Supplies:
  • scissors
  • 9" x 12" blue construction paper
  • eye droppers
  • thinned dark blue and light blue tempera paint
Setup:
Cut a large raindrop shape from the blue paper and then cut out the center to make a frame.
Steps:
  1. Use an eyedropper to drip several drops of each paint onto the white paper.
  2. Use the straw to blow the paint around the paper. Let it dry.
  3. Glue the frame onto the painted paper.
  4. Trim the excess paper away from the outside of the frame.
- See more at: http://www.theeducationcenter.com/af/nl/tec/core/efile/CompanionDetailViewer.do?DETAIL=040713_artscrafts_03&utm_source=ArtsCrafts3&utm_medium=Email&utm_content=Text&utm_campaign=040713ArtsandCrafts#sthash.dSLi8Ic4.dpuf

Type: craft
The forecast for this drip-drop display is a puff of wind and a shower of fun!
Supplies:
  • scissors
  • 9" x 12" blue construction paper
  • eye droppers
  • thinned dark blue and light blue tempera paint
Setup:
Cut a large raindrop shape from the blue paper and then cut out the center to make a frame.
Steps:
  1. Use an eyedropper to drip several drops of each paint onto the white paper.
  2. Use the straw to blow the paint around the paper. Let it dry.
  3. Glue the frame onto the painted paper.
  4. Trim the excess paper away from the outside of the frame.
- See more at: http://www.theeducationcenter.com/af/nl/tec/core/efile/CompanionDetailViewer.do?DETAIL=040713_artscrafts_03&utm_source=ArtsCrafts3&utm_medium=Email&utm_content=Text&utm_campaign=040713ArtsandCrafts#sthash.dSLi8Ic4.dpuf
Collecting a pail full of tadpoles has never been easier! Press a tadpole-shaped sponge in a shallow pan of green paint and then onto a silver poster board pail cutout. Repeat the process, adding paint as needed, until a desired effect is achieved. When the paint is dry, use a marker to add an eye to each tadpole; then attach a paper handle to the pail.
- See more at: http://www.theeducationcenter.com/af/nl/tec/core/efile/CompanionDetailViewer.do?DETAIL=040713_artscrafts_01&utm_source=ArtsCrafts1&utm_medium=Email&utm_content=Text&utm_campaign=040713ArtsandCrafts#sthash.Y2yjGKtc.dpuf
Collecting a pail full of tadpoles has never been easier! Press a tadpole-shaped sponge in a shallow pan of green paint and then onto a silver poster board pail cutout. Repeat the process, adding paint as needed, until a desired effect is achieved. When the paint is dry, use a marker to add an eye to each tadpole; then attach a paper handle to the pail.
- See more at: http://www.theeducationcenter.com/af/nl/tec/core/efile/CompanionDetailViewer.do?DETAIL=040713_artscrafts_01&utm_source=ArtsCrafts1&utm_medium=Email&utm_content=Text&utm_campaign=040713ArtsandCrafts#sthash.Y2yjGKtc.dpuf
Collecting a pail full of tadpoles has never been easier! Press a tadpole-shaped sponge in a shallow pan of green paint and then onto a silver poster board pail cutout. Repeat the process, adding paint as needed, until a desired effect is achieved. When the paint is dry, use a marker to add an eye to each tadpole; then attach a paper handle to the pail.
- See more at: http://www.theeducationcenter.com/af/nl/tec/core/efile/CompanionDetailViewer.do?DETAIL=040713_artscrafts_01&utm_source=ArtsCrafts1&utm_medium=Email&utm_content=Text&utm_campaign=040713ArtsandCrafts#sthash.Y2yjGKtc.dpuf
Collecting a pail full of tadpoles has never been easier! Press a tadpole-shaped sponge in a shallow pan of green paint and then onto a silver poster board pail cutout. Repeat the process, adding paint as needed, until a desired effect is achieved. When the paint is dry, use a marker to add an eye to each tadpole; then attach a paper handle to the pail.
- See more at: http://www.theeducationcenter.com/af/nl/tec/core/efile/CompanionDetailViewer.do?DETAIL=040713_artscrafts_01&utm_source=ArtsCrafts1&utm_medium=Email&utm_content=Text&utm_campaign=040713ArtsandCrafts#sthash.Y2yjGKtc.dpuf
Collecting a pail full of tadpoles has never been easier! Press a tadpole-shaped sponge in a shallow pan of green paint and then onto a silver poster board pail cutout. Repeat the process, adding paint as needed, until a desired effect is achieved. When the paint is dry, use a marker to add an eye to each tadpole; then attach a paper handle to the pail.
- See more at: http://www.theeducationcenter.com/af/nl/tec/core/efile/CompanionDetailViewer.do?DETAIL=040713_artscrafts_01&utm_source=ArtsCrafts1&utm_medium=Email&utm_content=Text&utm_campaign=040713ArtsandCrafts#sthash.Y2yjGKtc.dpuf
Type: craft
The forecast for this drip-drop display is a puff of wind and a shower of fun!
Supplies:
  • scissors
  • 9" x 12" blue construction paper
  • eye droppers
  • thinned dark blue and light blue tempera paint
Setup:
Cut a large raindrop shape from the blue paper and then cut out the center to make a frame.
Steps:
  1. Use an eyedropper to drip several drops of each paint onto the white paper.
  2. Use the straw to blow the paint around the paper. Let it dry.
  3. Glue the frame onto the painted paper.
  4. Trim the excess paper away from the outside of the frame.
- See more at: http://www.theeducationcenter.com/af/nl/tec/core/efile/CompanionDetailViewer.do?DETAIL=040713_artscrafts_03&utm_source=ArtsCrafts3&utm_medium=Email&utm_content=Text&utm_campaign=040713ArtsandCrafts#sthash.dSLi8Ic4.dpuf
Type: craft
The forecast for this drip-drop display is a puff of wind and a shower of fun!
Supplies:
  • scissors
  • 9" x 12" blue construction paper
  • eye droppers
  • thinned dark blue and light blue tempera paint
Setup:
Cut a large raindrop shape from the blue paper and then cut out the center to make a frame.
Steps:
  1. Use an eyedropper to drip several drops of each paint onto the white paper.
  2. Use the straw to blow the paint around the paper. Let it dry.
  3. Glue the frame onto the painted paper.
  4. Trim the excess paper away from the outside of the frame.
- See more at: http://www.theeducationcenter.com/af/nl/tec/core/efile/CompanionDetailViewer.do?DETAIL=040713_artscrafts_03&utm_source=ArtsCrafts3&utm_medium=Email&utm_content=Text&utm_campaign=040713ArtsandCrafts#sthash.dSLi8Ic4.dpuf
Type: craft
The forecast for this drip-drop display is a puff of wind and a shower of fun!
Supplies:
  • scissors
  • 9" x 12" blue construction paper
  • eye droppers
  • thinned dark blue and light blue tempera paint
Setup:
Cut a large raindrop shape from the blue paper and then cut out the center to make a frame.
Steps:
  1. Use an eyedropper to drip several drops of each paint onto the white paper.
  2. Use the straw to blow the paint around the paper. Let it dry.
  3. Glue the frame onto the painted paper.
  4. Trim the excess paper away from the outside of the frame.
- See more at: http://www.theeducationcenter.com/af/nl/tec/core/efile/CompanionDetailViewer.do?DETAIL=040713_artscrafts_03&utm_source=ArtsCrafts3&utm_medium=Email&utm_content=Text&utm_campaign=040713ArtsandCrafts#sthash.dSLi8Ic4.dpuf
Type: craft
The forecast for this drip-drop display is a puff of wind and a shower of fun!
Supplies:
  • scissors
  • 9" x 12" blue construction paper
  • eye droppers
  • thinned dark blue and light blue tempera paint
Setup:
Cut a large raindrop shape from the blue paper and then cut out the center to make a frame.
Steps:
  1. Use an eyedropper to drip several drops of each paint onto the white paper.
  2. Use the straw to blow the paint around the paper. Let it dry.
  3. Glue the frame onto the painted paper.
  4. Trim the excess paper away from the outside of the frame.
- See more at: http://www.theeducationcenter.com/af/nl/tec/core/efile/CompanionDetailViewer.do?DETAIL=040713_artscrafts_03&utm_source=ArtsCrafts3&utm_medium=Email&utm_content=Text&utm_campaign=040713ArtsandCrafts#sthash.dSLi8Ic4.dpuf
Type: craft
The forecast for this drip-drop display is a puff of wind and a shower of fun!
Supplies:
  • scissors
  • 9" x 12" blue construction paper
  • eye droppers
  • thinned dark blue and light blue tempera paint
Setup:
Cut a large raindrop shape from the blue paper and then cut out the center to make a frame.
Steps:
  1. Use an eyedropper to drip several drops of each paint onto the white paper.
  2. Use the straw to blow the paint around the paper. Let it dry.
  3. Glue the frame onto the painted paper.
  4. Trim the excess paper away from the outside of the frame.
- See more at: http://www.theeducationcenter.com/af/nl/tec/core/efile/CompanionDetailViewer.do?DETAIL=040713_artscrafts_03&utm_source=ArtsCrafts3&utm_medium=Email&utm_content=Text&utm_campaign=040713ArtsandCrafts#sthash.dSLi8Ic4.dpuf
Type: craft
The forecast for this drip-drop display is a puff of wind and a shower of fun!
Supplies:
  • scissors
  • 9" x 12" blue construction paper
  • eye droppers
  • thinned dark blue and light blue tempera paint
Setup:
Cut a large raindrop shape from the blue paper and then cut out the center to make a frame.
Steps:
  1. Use an eyedropper to drip several drops of each paint onto the white paper.
  2. Use the straw to blow the paint around the paper. Let it dry.
  3. Glue the frame onto the painted paper.
  4. Trim the excess paper away from the outside of the frame.
- See more at: http://www.theeducationcenter.com/af/nl/tec/core/efile/CompanionDetailViewer.do?DETAIL=040713_artscrafts_03&utm_source=ArtsCrafts3&utm_medium=Email&utm_content=Text&utm_campaign=040713ArtsandCrafts#sthash.dSLi8Ic4.dpuf

Type: craft
The forecast for this drip-drop display is a puff of wind and a shower of fun!
Supplies:
  • scissors
  • 9" x 12" blue construction paper
  • eye droppers
  • thinned dark blue and light blue tempera paint
Setup:
Cut a large raindrop shape from the blue paper and then cut out the center to make a frame.
Steps:
  1. Use an eyedropper to drip several drops of each paint onto the white paper.
  2. Use the straw to blow the paint around the paper. Let it dry.
  3. Glue the frame onto the painted paper.
  4. Trim the excess paper away from the outside of the frame.
- See more at: http://www.theeducationcenter.com/af/nl/tec/core/efile/CompanionDetailViewer.do?DETAIL=040713_artscrafts_03&utm_source=ArtsCrafts3&utm_medium=Email&utm_content=Text&utm_campaign=040713ArtsandCrafts#sthash.dSLi8Ic4.dpuf

Type: craft
The forecast for this drip-drop display is a puff of wind and a shower of fun!
Supplies:
  • scissors
  • 9" x 12" blue construction paper
  • eye droppers
  • thinned dark blue and light blue tempera paint
Setup:
Cut a large raindrop shape from the blue paper and then cut out the center to make a frame.
Steps:
  1. Use an eyedropper to drip several drops of each paint onto the white paper.
  2. Use the straw to blow the paint around the paper. Let it dry.
  3. Glue the frame onto the painted paper.
  4. Trim the excess paper away from the outside of the frame.

- See more at: http://www.theeducationcenter.com/af/nl/tec/core/efile/CompanionDetailViewer.do?DETAIL=040713_artscrafts_03&utm_source=ArtsCrafts3&utm_medium=Email&utm_content=Text&utm_campaign=040713ArtsandCrafts#sthash.dSLi8Ic4.dpuf

Type: craft
The forecast for this drip-drop display is a puff of wind and a shower of fun!
Supplies:
  • scissors
  • 9" x 12" blue construction paper
  • eye droppers
  • thinned dark blue and light blue tempera paint
Setup:
Cut a large raindrop shape from the blue paper and then cut out the center to make a frame.
Steps:
  1. Use an eyedropper to drip several drops of each paint onto the white paper.
  2. Use the straw to blow the paint around the paper. Let it dry.
  3. Glue the frame onto the painted paper.
  4. Trim the excess paper away from the outside of the frame.

- See more at: http://www.theeducationcenter.com/af/nl/tec/core/efile/CompanionDetailViewer.do?DETAIL=040713_artscrafts_03&utm_source=ArtsCrafts3&utm_medium=Email&utm_content=Text&utm_campaign=040713ArtsandCrafts#sthash.dSLi8Ic4.dpuf

Thursday, March 28, 2013

Mailbox Thursday

Roll a Rainbow:

Type: craft
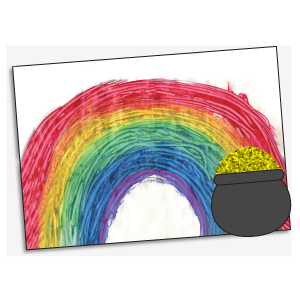
Draw a rainbow on a sheet of paper. Dip the wheels of a toy vehicle in paint; then roll the vehicle along one arc, adding more paint to the wheels as needed. Continue with other vehicles and colors of paint for each remaining arc. To complete the project, glue a black pot cutout to one end of the rainbow. Then add gold glitter to the top of the pot so it resembles a pot of gold.

ype: craft
Draw a rainbow on a sheet of paper. Dip the wheels of a toy vehicle in paint; then roll the vehicle along one arc, adding more paint to the wheels as needed. Continue with other vehicles and colors of paint for each remaining arc. To complete the project, glue a black pot cutout to one end of the rainbow. Then add gold glitter to the top of the pot so it resembles a pot of gold.
- See more at: http://www.theeducationcenter.com/af/nl/tec/core/efile/CompanionDetailViewer.do?DETAIL=031013_artscrafts_01&utm_source=ArtsCrafts1&utm_medium=Email&utm_content=Text&utm_campaign=031013ArtsandCrafts#sthash.nhf2DqNA.dpuf

Thursday, February 28, 2013

Mailbox Thursday


  • copy of the cat pattern (see print link)
  • 9" x 12" construction paper
  • red and white construction paper scraps
  • crayons
  • glue
  • - See more at: http://www.theeducationcenter.com/af/nl/tec/core/efile/CompanionDetailViewer.do?flow.ctxID=1361749539490{2,12}&flow.seqID=1361749546522#sthash.zCH3iqTe.dpuf
    Type: craft
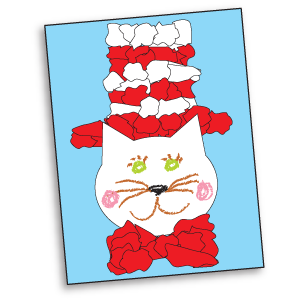
    Honor Dr. Seuss's birthday (March 2) with this colorful project!
    Materials for one project:
    • copy of the cat pattern (see print link)
    • 9" x 12" construction paper
    • red and white construction paper scraps
    • crayons
    • glue
    Steps:
    1. Color and cut out the cat pattern. Glue it in the middle of the construction paper.
    2. Lightly draw a hat outline above the cat's head and a bow tie outline below it.
    3. Tear pieces of red and white paper. Glue a row of overlapping red pieces inside the hat outline. Then glue a row of white pieces. Alternate rows until the outline is filled.
    4. Glue overlapped red pieces inside the bow tie outline.
    - See more at: http://www.theeducationcenter.com/af/nl/tec/core/efile/CompanionDetailViewer.do?flow.ctxID=1361749539490{2,12}&flow.seqID=1361749546522#sthash.zCH3iqTe.dpuf
    Type: craft
    Honor Dr. Seuss's birthday (March 2) with this colorful project!
    Materials for one project:
    • copy of the cat pattern (see print link)
    • 9" x 12" construction paper
    • red and white construction paper scraps
    • crayons
    • glue
    Steps:
    1. Color and cut out the cat pattern. Glue it in the middle of the construction paper.
    2. Lightly draw a hat outline above the cat's head and a bow tie outline below it.
    3. Tear pieces of red and white paper. Glue a row of overlapping red pieces inside the hat outline. Then glue a row of white pieces. Alternate rows until the outline is filled.
    4. Glue overlapped red pieces inside the bow tie outline.
    - See more at: http://www.theeducationcenter.com/af/nl/tec/core/efile/CompanionDetailViewer.do?flow.ctxID=1361749539490{2,12}&flow.seqID=1361749546522#sthash.zCH3iqTe.dpuf
    Type: craft
    Honor Dr. Seuss's birthday (March 2) with this colorful project!
    Materials for one project:
    • copy of the cat pattern (see print link)
    • 9" x 12" construction paper
    • red and white construction paper scraps
    • crayons
    • glue
    Steps:
    1. Color and cut out the cat pattern. Glue it in the middle of the construction paper.
    2. Lightly draw a hat outline above the cat's head and a bow tie outline below it.
    3. Tear pieces of red and white paper. Glue a row of overlapping red pieces inside the hat outline. Then glue a row of white pieces. Alternate rows until the outline is filled.
    4. Glue overlapped red pieces inside the bow tie outline.
    - See more at: http://www.theeducationcenter.com/af/nl/tec/core/efile/CompanionDetailViewer.do?flow.ctxID=1361749539490{2,12}&flow.seqID=1361749546522#sthash.zCH3iqTe.dpuf
    Type: craft
    Honor Dr. Seuss's birthday (March 2) with this colorful project!
    Materials for one project:
    • copy of the cat pattern (see print link)
    • 9" x 12" construction paper
    • red and white construction paper scraps
    • crayons
    • glue
    Steps:
    1. Color and cut out the cat pattern. Glue it in the middle of the construction paper.
    2. Lightly draw a hat outline above the cat's head and a bow tie outline below it.
    3. Tear pieces of red and white paper. Glue a row of overlapping red pieces inside the hat outline. Then glue a row of white pieces. Alternate rows until the outline is filled.
    4. Glue overlapped red pieces inside the bow tie outline.
    - See more at: http://www.theeducationcenter.com/af/nl/tec/core/efile/CompanionDetailViewer.do?flow.ctxID=1361749539490{2,12}&flow.seqID=1361749546522#sthash.zCH3iqTe.dpuf
    Type: craft
    Honor Dr. Seuss's birthday (March 2) with this colorful project!
    Materials for one project:
    • copy of the cat pattern (see print link)
    • 9" x 12" construction paper
    • red and white construction paper scraps
    • crayons
    • glue
    Steps:
    1. Color and cut out the cat pattern. Glue it in the middle of the construction paper.
    2. Lightly draw a hat outline above the cat's head and a bow tie outline below it.
    3. Tear pieces of red and white paper. Glue a row of overlapping red pieces inside the hat outline. Then glue a row of white pieces. Alternate rows until the outline is filled.
    4. Glue overlapped red pieces inside the bow tie outline.
    - See more at: http://www.theeducationcenter.com/af/nl/tec/core/efile/CompanionDetailViewer.do?flow.ctxID=1361749539490{2,12}&flow.seqID=1361749546522#sthash.zCH3iqTe.dpuf

    Type: craft
    Honor Dr. Seuss's birthday (March 2) with this colorful project!
    Materials for one project:
    • copy of the cat pattern (see print link)
    • 9" x 12" construction paper
    • red and white construction paper scraps
    • crayons
    • glue
    Steps:
    1. Color and cut out the cat pattern. Glue it in the middle of the construction paper.
    2. Lightly draw a hat outline above the cat's head and a bow tie outline below it.
    3. Tear pieces of red and white paper. Glue a row of overlapping red pieces inside the hat outline. Then glue a row of white pieces. Alternate rows until the outline is filled.
    4. Glue overlapped red pieces inside the bow tie outline.
    - See more at: http://www.theeducationcenter.com/af/nl/tec/core/efile/CompanionDetailViewer.do?flow.ctxID=1361749539490{2,12}&flow.seqID=1361749546522#sthash.zCH3iqTe.dpuf
    Type: craft
    Honor Dr. Seuss's birthday (March 2) with this colorful project!
    Materials for one project:
    • copy of the cat pattern (see print link)
    • 9" x 12" construction paper
    • red and white construction paper scraps
    • crayons
    • glue
    Steps:
    1. Color and cut out the cat pattern. Glue it in the middle of the construction paper.
    2. Lightly draw a hat outline above the cat's head and a bow tie outline below it.
    3. Tear pieces of red and white paper. Glue a row of overlapping red pieces inside the hat outline. Then glue a row of white pieces. Alternate rows until the outline is filled.
    4. Glue overlapped red pieces inside the bow tie outline.
    - See more at: http://www.theeducationcenter.com/af/nl/tec/core/efile/CompanionDetailViewer.do?flow.ctxID=1361749539490{2,12}&flow.seqID=1361749546522#sthash.zCH3iqTe.dpuf
    Yea, It's Doctor Seuss birthday soon. Enjoy this special activity and celebrate some Green Eggs and Ham. Oh and don't forget One fish, Two fish, Red fish, Blue fish.


     Materials:
         Copy of the cat pattern
         9 x 12 construction paper
         Red and white construction paper scraps
         Crayons
         Glue


    Steps:
    1. Color and cut out the cat pattern. Glue it in the middle of the construction paper
    2.  Lightly draw a hat outline above the cat's head and a bow tie outline below it
    3. Tear pieces of red and white paper. Glue a row of overlapping red pieces inside the hat outline. Then glue a row of white pieces. Alternate the pieces until the outline is filled.
    4. Glue overlapped red pieces inside the bow tie outline. 
            
                                        
    Lightly draw a hat outline above the cat's head and a bow tie outline below it. - See more at: http://www.theeducationcenter.com/af/nl/tec/core/efile/CompanionDetailViewer.do?flow.ctxID=1361749539490{2,12}&flow.seqID=1361749546522#sthash.zCH3iqTe.dpuf

    Type: craft
    Honor Dr. Seuss's birthday (March 2) with this colorful project!
    Materials for one project:
    • copy of the cat pattern (see print link)
    • 9" x 12" construction paper
    • red and white construction paper scraps
    • crayons
    • glue
    Steps:
    1. Color and cut out the cat pattern. Glue it in the middle of the construction paper.
    2. Lightly draw a hat outline above the cat's head and a bow tie outline below it.
    3. Tear pieces of red and white paper. Glue a row of overlapping red pieces inside the hat outline. Then glue a row of white pieces. Alternate rows until the outline is filled.
    4. Glue overlapped red pieces inside the bow tie outline.
    - See more at: http://www.theeducationcenter.com/af/nl/tec/core/efile/CompanionDetailViewer.do?flow.ctxID=1361749539490{2,12}&flow.seqID=1361749546522#sthash.zCH3iqTe.dpuf
    Materials for one project:
    • copy of the cat pattern (see print link)
    • 9" x 12" construction paper
    • red and white construction paper scraps
    • crayons
    • glue
    Steps:
    1. Color and cut out the cat pattern. Glue it in the middle of the construction paper.
    2. Lightly draw a hat outline above the cat's head and a bow tie outline below it.
    3. Tear pieces of red and white paper. Glue a row of overlapping red pieces inside the hat outline. Then glue a row of white pieces. Alternate rows until the outline is filled.
    4. Glue overlapped red pieces inside the bow tie outline.
    - See more at: http://www.theeducationcenter.com/af/nl/tec/core/efile/CompanionDetailViewer.do?flow.ctxID=1361749539490{2,12}&flow.seqID=1361749546522#sthash.zCH3iqTe.dpuf
    Materials for one project:
    • copy of the cat pattern (see print link)
    • 9" x 12" construction paper
    • red and white construction paper scraps
    • crayons
    • glue
    Steps:
    1. Color and cut out the cat pattern. Glue it in the middle of the construction paper.
    2. Lightly draw a hat outline above the cat's head and a bow tie outline below it.
    3. Tear pieces of red and white paper. Glue a row of overlapping red pieces inside the hat outline. Then glue a row of white pieces. Alternate rows until the outline is filled.
    4. Glue overlapped red pieces inside the bow tie outline.
    - See more at: http://www.theeducationcenter.com/af/nl/tec/core/efile/CompanionDetailViewer.do?flow.ctxID=1361749539490{2,12}&flow.seqID=1361749546522#sthash.zCH3iqTe.dpuf

    Thursday, February 14, 2013

    Mailbox Thursday

    A great way to celebrate someone special's birthday:
    Type: craft
    Invite each youngster to make one of these tasty-looking treats in honor of his birthday.
    Materials for one cupcake:
    • mixture of equal parts shaving cream and glue (icing)
    • 4" x 6" paper rectangle
    • 9" x 12" construction paper
    • small red paper circle (cherry)
    • colorful paper scraps
    • scissors
    • crayons
    • glue
    Steps:
    1. Trim the rectangle to resemble a cupcake liner and add desired details.
    2. Glue the liner onto the construction paper.
    3. Fingerpaint icing above the liner, as shown.
    4. While the icing is still wet, cut the paper scraps into small pieces and gently press the resulting sprinkles and the cherry into the icing.
     
     
    Type: craft
    Celebrate Presidents' Day with this adorable craft. To make this Abraham Lincoln likeness, paint a youngster's fingers black and her palm beige. Have her press her hand onto a sheet of white construction paper. Then use a paintbrush to fill in any gaps in the print. When the paint is dry, have her use a marker to add facial details to the print. Finally, trim around the print; then help her cut out and glue a paper top hat to the cutout.

    Thursday, January 17, 2013

    Mailbox Thursday

    I love these ideas, they are adorable. 


    Type: craft
    Create a flurry of writing inspiration with these cool snow globe projects! After each child makes one, have him look at his winter scene as he writes a story about a winter adventure.
    Materials for each student:
    • 6" blue construction paper square
    • 6" x 9" red construction paper
    • two 9" paper plates
    • piece of plastic wrap slightly
    • larger than the plates
    • cotton-tipped swab
    Steps:
    1. Use crayons to draw a winter scene on the blue paper.
    2. Dip the cotton-tipped swab in paint and dab white dots onto the scene.
    3. Once the paint is dry, glue the scene on the center of one plate.
    4. Cut the inner circle from the other plate. Tape the plastic wrap to the back of the plate so that it is tight. Then glue the plate on top of the other plate.
    5. Trim the red paper into a base shape. Glue it to the back of the plates.

    Type: craft
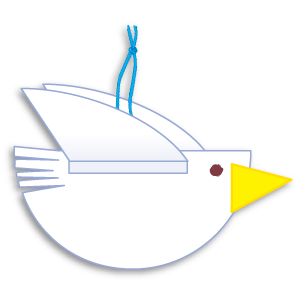
    Honor Martin Luther King Jr. with this double-sided project that gives students practice folding and cutting.
    Materials for one dove:
    • large white paper circle
    • 2 equal-size yellow paper
    • triangles (beak)
    • hole puncher
    • scissors
    • glue
    • crayons
    • yarn
    Steps:
    1. Fold the circle in half, open it, and cut on the fold line.
    2. Cut a few slits in one end of a semicircle (body) to look like tail feathers.
    3. Glue a beak and draw an eye on each side of the body.
    4. Fold the other semicircle in half, open it, and cut on the fold line to make two wings.
    5. Make a tab on each wing by folding down one of the straight edges. Glue one tab to each side of the body.
    6. Hole-punch the top of the project. Thread a yarn length through the hole and tie its ends to make a hanger.
     
     
    Type: craft
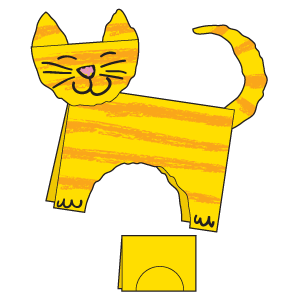
    No scissors are needed to create this self-standing tabby cat!
    Supplies:
    • 12" x 18" yellow construction paper
    • half of an orange crayon, paper removed
    • glue
    • crayons
    • pencil
    Setup:
    Fold the paper in half. Starting from the open end of the paper, draw a semicircle as shown.
    Steps:
    1. Make stripes on both sides of the folded paper by rubbing the side of the orange crayon across the paper.
    2. Gently tear along the line through both sides of the folded paper to make the cat’s body. Save the two resulting pieces of torn paper for the next step. (Provide help with tearing as needed.)
    3. Use one piece of the torn paper for a head. Add facial features with crayons. Glue the head to the body.
    4. Tear the other piece of torn paper to make two ears and a tail. Glue the ears to the head and the tail to the body.
     

    Thursday, January 10, 2013

    Mailbox Thursday

    Well it's officially 2013 and your heading back to school. Here are some fantastic activities to work with the little ones during the long winter nights. 

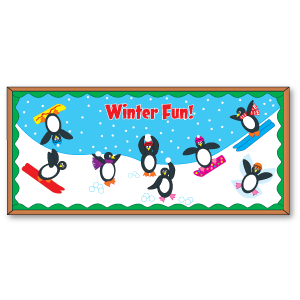
    Have each child transform a black oval into a penguin using a slightly smaller white oval (stomach), a small black circle (head), and construction paper scraps (eyes, beak, feet, and wings). Then encourage him to attach to his penguin a desired accessory, similar to the ones shown. Mount the penguins on a board decorated and titled as shown.
    Type: center/center mat
    Skill: counting, concept of addition
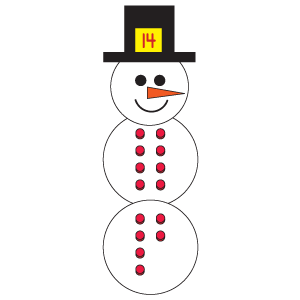
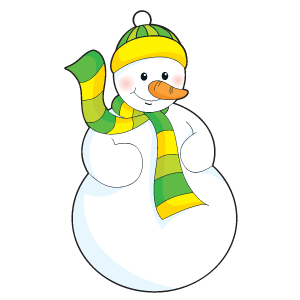
    Build counting or addition skills with a frosty friend! Make a paper snowman with a face and a top hat. Program several sticky notes for an option described below. Place the sticky notes, the snowman, and a supply of small craft foam or tagboard circles (buttons) at a center. Have students complete the activity as described.
    Counting: Write a different number on each sticky note. A student attaches a sticky note to the snowman's hat and then places the matching number of buttons on the snowman.
    Concept of addition: Write a different addition problem on each sticky note. A student attaches a sticky note to the snowman's hat and places the corresponding number of buttons on the snowman to solve the problem.

    Falling Snow


    Type: song/poem/rhyme
    When it's too cold and wet for outdoor play, help youngsters get rid of the wiggles with this cute song!
    (sung to the tune of "When the Saints Go Marching In")
    Oh, when the snow       Move fingers to resemble falling snow.
    Begins to fall,       Continue moving fingers.
    I'll build a snowman round and tall.       Move hands upward from floor.
    Oh, how I love the cold, cold weather       Hug self.
    When the snow begins to fall.       Move fingers to resemble falling snow.

    And then I'll lie       Sit on the floor.
    Down in the snow       Lie on the floor.
    And move my arms and legs just so.      Move arms and legs to make a snow angel.
    Oh, how I love to make snow angels       Continue moving arms and legs.
    When the snow begins to fall.       Continue moving arms and legs.

    Thursday, December 20, 2012

    Mailbox Thursday

    Here are some fun Mailbox activities for Christmas break to keep your little ones hands busy.


    Type: craft
    Science exploration and art combine to make this festive wrapping paper.
    Supplies:
    • food coloring
    • vegetable oil
    • several small plastic containers
    • white copy paper
    • eyedroppers
    • rectangular pan
    • water
    Setup:
    Partially fill several containers with water. As students observe, add several drops of a different color of food coloring to each container and mix well. Then pour oil into a separate plastic container.
    Steps:
    1. Lay the paper on a flat surface.
    2. Use eyedroppers to place several drops of each different-colored water on the paper.
    3. Use an eyedropper to drip several drops of oil on the paper, near the colored water droplets.
    4. Carefully lift the paper and hold it over the pan to allow the excess water and oil to drip into the pan. (The water and oil will run together as it runs down the paper. The two liquids won't mix, but will make interesting designs.) Set the paper aside to dry.
    5. Use the wrapping paper to wrap a special holiday present.


    Type: craft
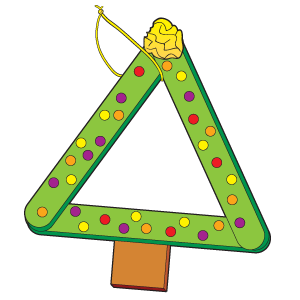
    Not only is this adorable project simple, but it is also a perfect gift! To make one, glue three jumbo craft sticks together to form a triangle. Allow the glue to dry. Then paint the sticks green. After the paint dries, glue a brown craft foam rectangle to the bottom of the tree to make a trunk. Then choose an option below.
    To make an ornament, tie a length of gold cord to the project to make a hanger. Crumple a piece of yellow tissue paper and then glue it to the top of the tree. Use a hole puncher to make circles of various colors. Then glue the circles to the tree.
    To make a frame, cut a piece of paper the same size and shape as the tree. Glue a photo to it. Glue the paper to the back of the tree so the photo shows in the opening. Adhere magnetic tape to the back of the project.

    Thursday, November 29, 2012

    Mailbox Thursday

    Here are your Thursday Activities


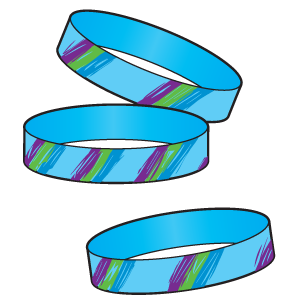
    Colorful Craft: bracelets

    This project results in an armful of decorative bracelets for any season.
    Supplies:
    • small colored envelope
    • markers or crayons
    • scissors
    Steps:
    1. Seal the envelope.
    2. Draw designs on the front and back of the envelope.
    3. Position the envelope horizontally. Cut the envelope, from the bottom to the top, into vertical strips.
    Colorful Craft: bracelets

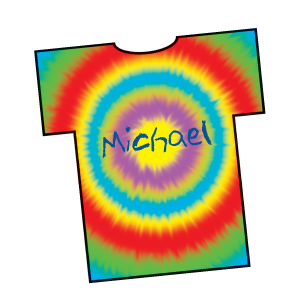
    Art Activity: T-shirts

    This craft is a perfect fit for youngsters of all ages.
    Supplies:
    • construction paper T-shirt (See print link for pattern.)
    • spray bottle of water
    • water-based markers
    Steps:
    1. Use markers to color the shirt.
    2. Spritz the shirt with water. Let the cutout dry.
    3. Use a marker to write your name across the front of the shirt.
    Print
    Art Activity: T-shirts

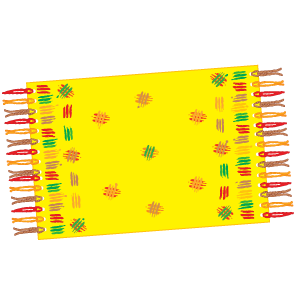
    Thanksgiving Craft: placemat

    Have your children create these easy Thanksgiving placemats, inspired by Native American designs, for use during home or school harvest celebrations. To begin, break off prongs from several plastic forks, leaving three prongs on each fork. Dip the forks in fall-colored paint and then press them, in turn, on a 12" x 18" piece of construction paper. Continue this process, using various fall colors until desirable patterns have been created. Once the paint has dried, laminate the paper. Then punch holes along each end of the paper and thread loops of yarn through the holes to create colorful fringe.
    Thanksgiving Craft: placemat

    Thursday, November 22, 2012

    Mailbox Thursday

    Keep in mind some activities for those little ones on break to keep from pulling out your hair over the holiday season.

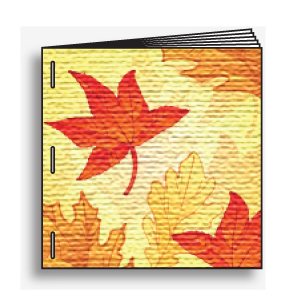
    Decorative Tip: seasonal napkins

    Save unused seasonal napkins from parties and special snacks to use as covers for student-made booklets. Cut student pages slightly smaller than the size of the napkins. Then staple the completed pages between two napkin covers. Not only are these covers durable, but students love the colorful designs!
    Decorative Tip: seasonal napkins

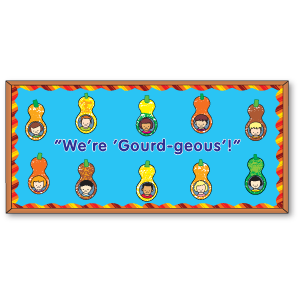
    Classroom Display: gourds

    Celebrate the season with this attractive display. Invite each child to sponge-paint a copy of the gourd pattern (see print link) using brown, green, yellow, and orange paint. After the paint is dry, have him cut out his gourd. Then direct him to glue to his gourd a construction paper stem and a photo of his face. Mount the projects to a board with the title "We're Gourd-geous'!"
    Print
    Classroom Display: gourds

    Thursday, November 15, 2012

    Thursday Mailbox.com

    Well the Holiday season is upon us and there is always fantastic craft ideas to keep the little ones busy. Hope you enjoy.

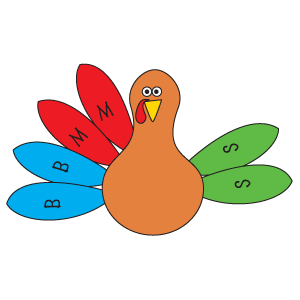
    Literacy Idea: letter matching

    Reinforce letter matching with this fun Thanksgiving activity. Attach a simple turkey body cutout to a wall. Then label pairs of construction paper feathers with matching letters and place the feathers on the floor. Invite a volunteer to choose a feather and then look for its match. When he finds the matching feather, prompt students to jump up and strut around the room while gobbling like turkeys. Then help the child attach both feathers to the turkey. Repeat the process for each remaining pair of feathers. For a different skill option, program pairs of feathers with matching uppercase and lowercase letters.
    Literacy Idea: letter matching

    Thursday, November 8, 2012

    Mailbox Thursday

    Have fun with these great projects. Help your little ones get into school.

    Fall Craft: corn


    There's nothing corny about this decorative corn-on-the-cob craft!
    Supplies:
    • 2 brown paper lunch bags
    • newspaper
    • string
    • 1/2" squares of colored construction paper
    • glue
    • ribbon
    Steps:
      Fall Craft: corn
    1. Crumple the newspaper and stuff it into each bag until the bag is about two-thirds full.
    2. Squeeze each bag to mold it into a corncob shape.
    3. Tie each bag securely with string about one-third of the way from the opening.
    4. Gently tear the unstuffed end of the bag into strips.
    5. Glue the squares in rows on the smoothest side of each corncob.
    6. Tie the corncobs together with the ribbon.


    Paper Craft: tearing

    The tearing process in this project results in a grand view of mountains and valleys!
    Supplies:
    • 12" x 18" blue construction paper
    • 10" x 18" white construction paper
    • 8" x 18" green construction paper
    • cotton balls
    • glue
    Steps:
    1. Tear a long side of the white paper.
    2. Place the white paper atop the blue paper and align the straight edges. Glue the paper in place.
    3. Tear a long side of the green paper.
    4. Place the green paper atop the white paper and align the straight edges. Glue the paper in place.
    5. Pull apart the cotton balls and glue them to the blue paper to resemble clouds.
    Paper Craft: tearing

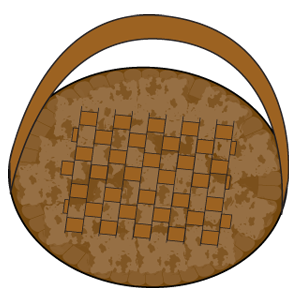
    Weaving Craft: basket

    This basketmaking craft is a bushel of fun!
    Supplies:
    • large paper plate
    • brown construction paper strips
    • 2" x 18" brown construction paper handle
    • shallow pan of brown tempera paint
    • small sponge
    • craft knife (for teacher use)
    • glue
    • scissors
    • stapler
    Setup:
    Use the craft knife to cut parallel slits in the middle of the paper plate.
    Steps:
    1. Sponge-paint the paper plate. Let the paint dry.
    2. Weave strips through the slits.
    3. Trim any excess paper and glue the ends of each strip in place. (Staple the handle to the plate to make a basket.)
    Weaving Craft: basket