

I love these ideas, they are adorable.
Type: craft
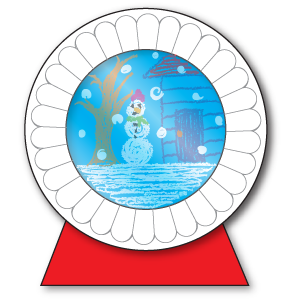
Create a flurry of writing
inspiration with these cool snow globe projects! After each child makes
one, have him look at his winter scene as he writes a story about a
winter adventure.
Materials for each student:
- 6" blue construction paper square
- 6" x 9" red construction paper
- two 9" paper plates
- piece of plastic wrap slightly
- larger than the plates
- cotton-tipped swab
Steps:
- Use crayons to draw a winter scene on the blue paper.
- Dip the cotton-tipped swab in paint and dab white dots onto the scene.
- Once the paint is dry, glue the scene on the center of one plate.
- Cut the inner circle from the other plate. Tape the plastic wrap to the back of the plate so that it is tight. Then glue the plate on top of the other plate.
- Trim the red paper into a base shape. Glue it to the back of the plates.
Type: craft
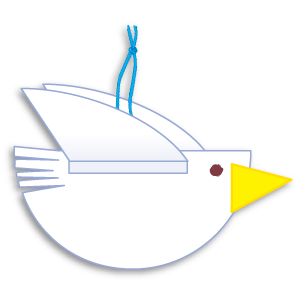
Honor Martin Luther King Jr. with this double-sided project that gives students practice folding and cutting.
Materials for one dove:
- large white paper circle
- 2 equal-size yellow paper
- triangles (beak)
- hole puncher
- scissors
- glue
- crayons
- yarn
Steps:
- Fold the circle in half, open it, and cut on the fold line.
- Cut a few slits in one end of a semicircle (body) to look like tail feathers.
- Glue a beak and draw an eye on each side of the body.
- Fold the other semicircle in half, open it, and cut on the fold line to make two wings.
- Make a tab on each wing by folding down one of the straight edges. Glue one tab to each side of the body.
- Hole-punch the top of the project. Thread a yarn length through the hole and tie its ends to make a hanger.
Type: craft
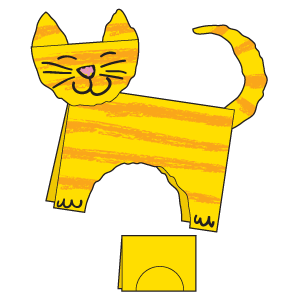
No scissors are needed to create this self-standing tabby cat!
Supplies:
- 12" x 18" yellow construction paper
- half of an orange crayon, paper removed
- glue
- crayons
- pencil
Setup:
Fold the paper in half. Starting from the open end of the paper, draw a semicircle as shown.
Steps:
- Make stripes on both sides of the folded paper by rubbing the side of the orange crayon across the paper.
- Gently tear along the line through both sides of the folded paper to make the cat’s body. Save the two resulting pieces of torn paper for the next step. (Provide help with tearing as needed.)
- Use one piece of the torn paper for a head. Add facial features with crayons. Glue the head to the body.
- Tear the other piece of torn paper to make two ears and a tail. Glue the ears to the head and the tail to the body.
No comments:
Post a Comment
Thank you for stopping by my blog. I will reply to your comment shortly.