Wrap It Up!
Type: craft
Science exploration and art combine to make this festive wrapping paper.
Supplies:
- food coloring
- vegetable oil
- several small plastic containers
- white copy paper
- eyedroppers
- rectangular pan
- water
Setup:
Partially fill several
containers with water. As students observe, add several drops of a
different color of food coloring to each container and mix well. Then
pour oil into a separate plastic container.
Steps:
- Lay the paper on a flat surface.
- Use eyedroppers to place several drops of each different-colored water on the paper.
- Use an eyedropper to drip several drops of oil on the paper, near the colored water droplets.
- Carefully lift the paper and hold it over the pan to allow the excess water and oil to drip into the pan. (The water and oil will run together as it runs down the paper. The two liquids won't mix, but will make interesting designs.) Set the paper aside to dry.
- Use the wrapping paper to wrap a special holiday present.
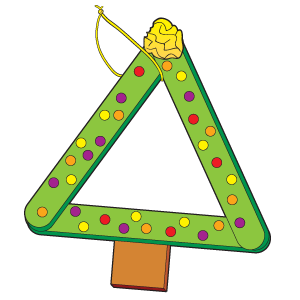
Triangular Tree
Type: craft
Not only is this adorable
project simple, but it is also a perfect gift! To make one, glue three
jumbo craft sticks together to form a triangle. Allow the glue to dry.
Then paint the sticks green. After the paint dries, glue a brown craft
foam rectangle to the bottom of the tree to make a trunk. Then choose an
option below.
To make an ornament, tie a
length of gold cord to the project to make a hanger. Crumple a piece of
yellow tissue paper and then glue it to the top of the tree. Use a hole
puncher to make circles of various colors. Then glue the circles to the
tree.
To make a frame, cut a piece
of paper the same size and shape as the tree. Glue a photo to it. Glue
the paper to the back of the tree so the photo shows in the opening.
Adhere magnetic tape to the back of the project.


Sweet and crafty Christmas tree decoration idea!
ReplyDelete