It Works Opportunity

It Works Opportunity
Health and Wellness coming your way

Thursday, January 31, 2013

My Baby's Turning 6

It's here, my youngest is turning 6. Happy birthday baby, I really hope you enjoy your day.


Happy Birthday son, I love you!


Wednesday, January 30, 2013

Work Out Wednesday

Week 6 training begins today and now comes the really important part. What shall I wear for my first race. It is at night, and it is a glow race. Here is what I'm considering. Well, maybe not all of them.


Choices, Choices what shall I wear?

Tuesday, January 29, 2013

Tuesday Time Out

I'm sure it was inevitable, and I'm sure at sometime I did it to. I know my husband did. I have tried to keep the scissors away from my youngest without supervision. But the other day, he said he needed a pair for school. So, being the mom I am of course I sent him with a pair. He left them in his backpack. And yesterday when he climbed out of my car he, cut his pants and hair. When I asked him why he cut his hair, he informed me, "He just wanted to be bald."

I have decided to not fix it for a few days let him learn a little lesson.

Monday, January 28, 2013

Mailbox Monday

Some special activities for kids

ype: craft
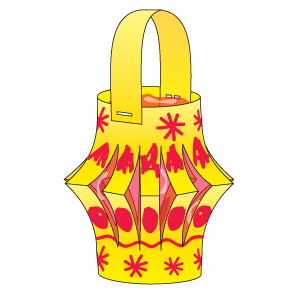
Decorative lanterns are part of the Chinese New Year season. Have youngsters make these fancy lanterns to hang around the classroom!
Supplies:
  • 12" x 18" yellow construction paper
  • red crayon
  • scissors
  • stapler
  • red cellophane
Setup:
Cut a 2" x 18" strip from the paper to use as a handle for the lantern.
Steps:
  1. Use the red crayon to draw a Chinese New Year picture on the paper.
  2. Fold the paper in half lengthwise. Then, starting from the folded side of the paper, cut several slits. (Unfold the paper, roll it into a cylinder, and staple the edges together. Staple the handle to the top of the cylinder.)
  3. Crumple a piece of cellophane and stuff it in the center of the lantern.
 
 
Type: craft
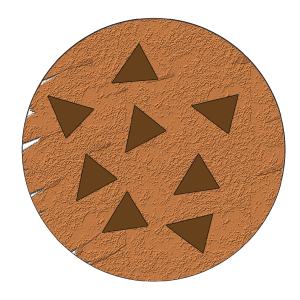
Mixing flour with paint gives this cookie painting a realistic texture!
Supplies:
  • white construction paper circle
  • small brown construction paper triangles (chocolate chips)
  • brown tempera paint
  • flour
  • paintbrush
  • glue
Setup:
Mix a half cup of flour with one cup of paint.
Steps:
  1. Paint the circle. Let the paint dry.
  2. Glue several chocolate chips onto the circle to resemble a cookie.
 
 
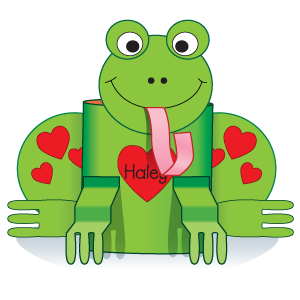
Students are sure to leap for this cute card collector! Ask your cafeteria director to save some of the large cans for you.
Materials for each student:
  • large, empty coffee can (or a gallon-vegetable or fruit can)
  • foot and arm templates (see print link)
  • 3 sheets of green construction paper
  • strip of green bulletin board paper
  • construction paper scraps (red, white, pink)
  • black crayon
  • scissors
  • glue
Steps:
  1. Wrap the bulletin board paper around the can and glue it in place. Fold any paper taller than the can over the top rim.
  2. On green construction paper, trace each foot and arm template twice; then cut out the shapes.
  3. To create the legs, fold another sheet of green construction paper in half and cut out a half-heart shape along the open side. Glue one foot on the pointed end of each leg; then glue the legs to the back of the can.
  4. Accordion-fold the base of each arm; glue the arms on the front of the can.
  5. Cut out and personalize a red paper heart. Glue it on the front of the can.
  6. Trim two white circles and draw a black dot on each one to make eyes. Glue each eye onto a slightly larger green circle before gluing both eyes on a large green circle (head). Draw a nose and mouth, then glue the head on the can. Use paper scraps to add other decorations as desired.


Sunday, January 27, 2013

Our World Tuesday

My mother-in-law lives in Wheatland, Wyoming and she sent me this great photo to enjoy yesterday. 


Ann Barker


                                                   Linking with: Our World Tuesday

Saturday, January 26, 2013

6WS

I'll Celebrate how I want to

http://www.123greetings.com/birthday/balloons/

Today was my birthday and I got to enjoy my day the way I wanted. Well, almost. I did have to do some laundry. I enjoyed completing it at my sister's because my washer is broke, and she has cable. I don't. Perfectly good trashy t.v. shows. How much fun it was.

Thursday, January 24, 2013

Bulletin Board Thursday


Usually I post mailbox items for students to create, however, my assistants and I created a very fun bulletin board. I came up with the concept and they really brought it together.

Wednesday, January 23, 2013

Work Out Wednesday

A fantastic experience this weekend at the runner's den. My mom, sister and I enjoyed the process of buying new running shoes. The guy was very helpful and I have a perfect pair of shoes that fit my feet, provide just the right amount of support and feel like I'm running on air. So, excited. 


Monday, January 21, 2013

Monday Madness

Gaining momentum for the week, I only find myself feeling rundown. Not a good way to start. Need a Monday madness cure. My kids struggle to wake up, I can't get organized and have to come back in my house three or four times to get things I have forgotten and then I always find when I get to work I have left something behind. UGH! Need to wake up earlier. Organize the night before and start my week off right.

How do you make it to work on time?
Monday 


Sunday, January 20, 2013

Our World Tuesday


A beautiful Arizona sunset!
Linking with: Our World Tuesday

weekend reflections

A quick photo of my oldest

6WS

-->
              Just want to Dance, Dance, Dance!


Thursday, January 17, 2013

Mailbox Thursday

I love these ideas, they are adorable. 


Type: craft
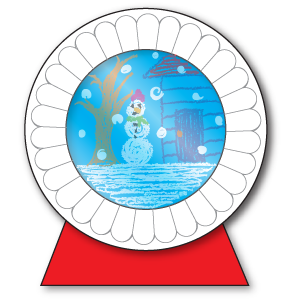
Create a flurry of writing inspiration with these cool snow globe projects! After each child makes one, have him look at his winter scene as he writes a story about a winter adventure.
Materials for each student:
  • 6" blue construction paper square
  • 6" x 9" red construction paper
  • two 9" paper plates
  • piece of plastic wrap slightly
  • larger than the plates
  • cotton-tipped swab
Steps:
  1. Use crayons to draw a winter scene on the blue paper.
  2. Dip the cotton-tipped swab in paint and dab white dots onto the scene.
  3. Once the paint is dry, glue the scene on the center of one plate.
  4. Cut the inner circle from the other plate. Tape the plastic wrap to the back of the plate so that it is tight. Then glue the plate on top of the other plate.
  5. Trim the red paper into a base shape. Glue it to the back of the plates.

Type: craft
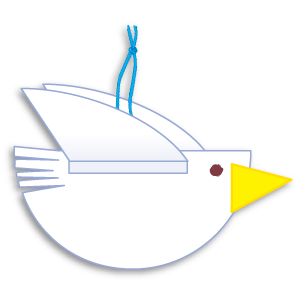
Honor Martin Luther King Jr. with this double-sided project that gives students practice folding and cutting.
Materials for one dove:
  • large white paper circle
  • 2 equal-size yellow paper
  • triangles (beak)
  • hole puncher
  • scissors
  • glue
  • crayons
  • yarn
Steps:
  1. Fold the circle in half, open it, and cut on the fold line.
  2. Cut a few slits in one end of a semicircle (body) to look like tail feathers.
  3. Glue a beak and draw an eye on each side of the body.
  4. Fold the other semicircle in half, open it, and cut on the fold line to make two wings.
  5. Make a tab on each wing by folding down one of the straight edges. Glue one tab to each side of the body.
  6. Hole-punch the top of the project. Thread a yarn length through the hole and tie its ends to make a hanger.
 
 
Type: craft
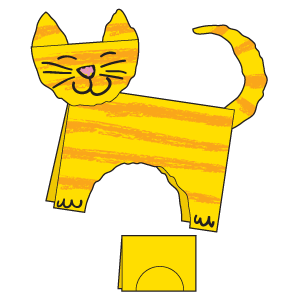
No scissors are needed to create this self-standing tabby cat!
Supplies:
  • 12" x 18" yellow construction paper
  • half of an orange crayon, paper removed
  • glue
  • crayons
  • pencil
Setup:
Fold the paper in half. Starting from the open end of the paper, draw a semicircle as shown.
Steps:
  1. Make stripes on both sides of the folded paper by rubbing the side of the orange crayon across the paper.
  2. Gently tear along the line through both sides of the folded paper to make the cat’s body. Save the two resulting pieces of torn paper for the next step. (Provide help with tearing as needed.)
  3. Use one piece of the torn paper for a head. Add facial features with crayons. Glue the head to the body.
  4. Tear the other piece of torn paper to make two ears and a tail. Glue the ears to the head and the tail to the body.
 

Tuesday, January 15, 2013

Tuesday

A special present for Christmas from his brother. It's so nice when they get along.

Linking with: Our World Tuesday

Monday, January 14, 2013

Making it count


my oldest to YMCA camp in Prescott. It was beautiful up there. Cold, but beautiful and he had a ton of fun. I'm glad we are able to send him to some enjoyable places.


 A Christmas Tree on the side of the road